
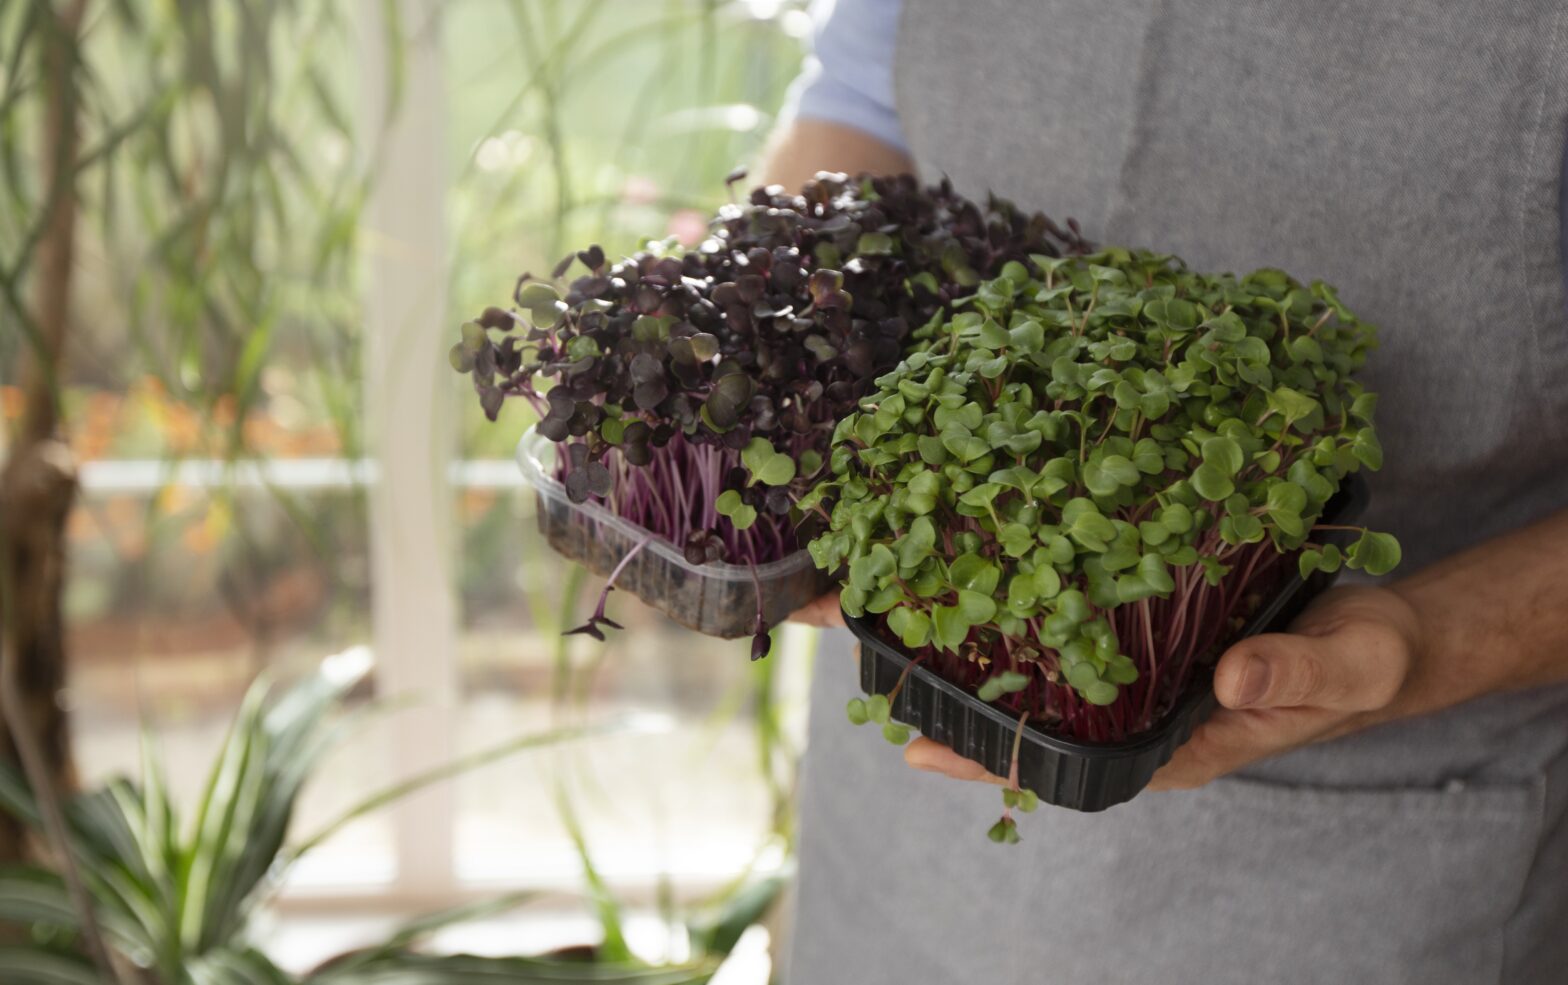
Microgreens are set to become one of the fastest food trends in the market of healthy foods among both home gardeners and nutrition enthusiasts. These mini greens are picked at a tender age but they are full of strong flavor, color, and strong nutrients. When you are in need of an easy, inexpensive, and gratifying hobby to cultivate fresh foods, the most ideal place to begin would be learning how to grow microgreens.
It is a comprehensive manual that targets home growers and beginners looking to follow well-explained step-by-step instructions. You will know how to plant microgreens in the house, you will know the basics of a guide on growing microgreens, you will learn simple microgreens to grow, microgreens that will bring immediate and consistent results. Located in an apartment, house or a small studio, microgreens will grow well in nearly any kind of indoor area.
What Are Microgreens?
Microgreens are young vegetable greens that are picked shortly after in the initial appearance of the first true leaves. They take 7 to 21 days or so to grow depending on the variety. In contrast to sprouts, microgreens are planted either in the soil or in a growing medium and have to be exposed to light to grow.
These greens are consumed in salads, sandwiches, smoothies, wraps and as garnishes. They have been very popular due to their ability to offer high nutritional value and yet have high taste which make them the favorite food to individuals who are health conscious.
Why Learn How to Grow Microgreens at Home?
Growing microgreens at home is not only simple but also incredibly rewarding, even for those with no gardening experience. With just a small packet of seeds, you can enjoy multiple quick harvests of fresh, nutrient-packed greens. This makes it both cost-effective and convenient, giving you access to healthy, flavorful microgreens without leaving your kitchen.
When you grow your own microgreens, you have complete control over what goes into your food. There are no harmful chemicals, no long transport delays, and maximum freshness in every bite. These tiny greens are perfect for adding to salads, sandwiches, smoothies, and wraps, instantly boosting your daily nutrition. With their fast growth, vibrant colors, and concentrated flavors, microgreens bring both health benefits and visual appeal to your meals, making them a must-have for any home kitchen looking to eat fresh and healthy.
Nutritional Benefits of Microgreens
Microgreens are usually regarded as nutritional superstars. Research has revealed that most varieties have more concentrations of vitamins and antioxidants as opposed to the mature vegetables. They are commonly rich in:
- Vitamin C
- Vitamin E
- Vitamin K
- Beta-carotene
- Iron, calcium, and magnesium
Due to their nutritional content, microgreens tend to be part of a balanced diet, a detox meal, and a wellness-centered diet.
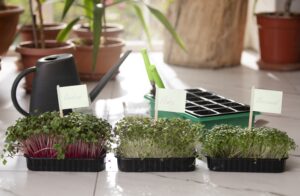
Easy Microgreens for Beginners
For those new to growing, starting with easy microgreens for beginners is the best way to gain confidence and enjoy early success. These varieties germinate quickly and require minimal care, making them perfect for first-time growers following a simple microgreen growing guide. Some popular beginner-friendly options include:
- Radish microgreens – Fast-growing with a mild, slightly spicy flavor
- Mustard microgreens – Aromatic and easy to manage
- Pea shoots – Sweet taste with high protein content
- Sunflower microgreens – Crunchy texture with a nutty flavor
- Broccoli microgreens – Packed with strong nutritional benefits
These microgreens not only grow quickly but also deliver vibrant colors and flavors, allowing beginners to enjoy fresh, healthy greens in salads, sandwiches, smoothies, and more.
What You Need to Grow Microgreens
Getting started with microgreens is easier than you might think. You don’t need expensive equipment or a green thumb just a few simple supplies to begin your indoor gardening journey. By having the right tools on hand, you’ll set yourself up for a successful and rewarding growing experience.
Essential Materials
- Shallow growing trays or containers – These provide enough space for roots to develop without taking up too much room.
- Quality microgreen seeds – Choose fresh, high-quality seeds for the best germination and nutrition.
- Growing medium – Options like coco peat, potting soil, or specialized grow mats work well for supporting healthy growth.
- Clean water spray bottle – Helps maintain the right moisture without overwatering.
- Light source – Natural sunlight or LED grow lights are essential for strong, vibrant leaves.
Once you have these basic materials, you’re ready to follow a simple step-by-step guide and start growing microgreens at home, enjoying fresh, nutrient-rich greens in just a few days.
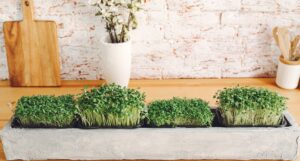
Step-by-Step Microgreens Growing Guide
This beginner-friendly guide makes it easy to grow microgreens at home. Follow these steps to enjoy fresh, nutrient-packed greens in just a few days.
Step 1: Prepare the Tray
Fill a shallow tray with a thin, even layer of your chosen growing medium. Lightly press it down without compacting it too tightly. A depth of 1.5 to 2 inches is ideal for root development.
Step 2: Sow the Seeds
Evenly spread the seeds over the surface. Avoid overcrowding, which can restrict airflow and cause mold growth. Different seeds may need specific spacing, but a uniform coverage generally works best.
Step 3: Water Gently
Use a spray bottle to mist the seeds thoroughly. The growing medium should be consistently moist, but not soaked, to encourage healthy germination.
Step 4: Cover and Germinate
Cover the tray with another tray or a lid to block light for the first 2–3 days. This promotes strong root growth and a robust start for your microgreens.
Step 5: Provide Light
Once the seeds begin to sprout, remove the cover and place the tray in sunlight or under a grow light. Adequate light prevents leggy stems and ensures vibrant, healthy leaves.
Step 6: Daily Care
Mist your microgreens once or twice daily and ensure proper airflow around the tray. This prevents mold and keeps the plants healthy.
Step 7: Harvest
Most microgreens are ready in 7 to 14 days. Using clean scissors, cut the greens just above the soil line and enjoy fresh, flavorful microgreens in salads, sandwiches, smoothies, and more.
How to Store Microgreens After Harvest
Freshly harvested microgreens are at their peak in flavor and nutrition when eaten immediately. If you need to store them, place the microgreens in an airtight container lined with a paper towel and keep them in the refrigerator. They will stay fresh for 3–5 days, retaining most of their vibrant taste and nutritional value.
Growing Microgreens Year-Round
One of the biggest advantages of microgreens is their adaptability. You can grow them indoors at any time of the year, regardless of seasonal changes or weather conditions. Indoor growing ensures a steady supply of fresh, healthy greens for your meals. Their quick growth cycle and versatility make them a favorite for health-conscious households.
Sustainability and Microgreens
Microgreens are not only nutritious but also environmentally friendly. They require much less water and space compared to traditional crops, making them a sustainable choice. Growing microgreens at home reduces packaging waste and transportation emissions. Brands like Greenu Microgreens promote sustainable practices by encouraging local and home-based cultivation of nutrient-rich greens.
Why Microgreens Are Ideal for Beginners
Microgreens are forgiving plants that thrive even when conditions aren’t perfect, making them perfect for beginner gardeners. Following a simple microgreens growing guide allows newcomers to achieve quick success, building confidence and encouraging exploration of more varieties. Their ease of growth and quick harvest make microgreens an excellent starting point for anyone looking to enjoy fresh, homegrown nutrition.
Adding Microgreens to Daily Meals
Microgreens are incredibly versatile and can be incorporated into almost any meal to boost flavor and nutrition. Add a handful to breakfast sandwiches, salads, wraps, smoothies, soups, curries, or even rice and noodle dishes. Their fresh, vibrant taste and concentrated nutrients make every bite more enjoyable and healthful. Even a small serving can enhance your meal with vitamins, minerals, and antioxidants, making microgreens a favorite for health-conscious consumers who want to eat fresh and nutritious food every day.
Home Growing vs Buying Microgreens
While buying microgreens is convenient, growing them at home offers unmatched freshness, superior taste, and significant cost savings. Once you know how to grow microgreens, you can harvest exactly what you need, reducing waste and ensuring optimal nutrient content. Homegrown microgreens also allow you to experiment with different varieties and flavors that may not be readily available in stores. Trusted brands like Greenu Microgreens not only provide high-quality seeds and guidance but also promote awareness about the benefits of fresh, locally grown microgreens, helping you enjoy better nutrition and healthier meals every day.
Frequently Asked Questions (FAQs)
- How long does it take to grow microgreens?
Most microgreens are ready to harvest within 7 to 14 days. Depending on the variety and growing conditions, some may take up to 21 days. Their fast growth makes them an ideal choice for beginners and those seeking quick, fresh greens.
- Do microgreens need sunlight?
Yes, microgreens require light after germination to grow healthy and strong. Both natural sunlight and LED grow lights are effective in providing the energy they need for vibrant leaves and sturdy stems.
- Are microgreens easy for beginners?
Absolutely. Many varieties, especially easy microgreens for beginners, grow quickly and require minimal care. With a simple microgreen growing guide, first-time growers can enjoy successful harvests without prior gardening experience.
- Can microgreens be grown without soil?
Yes, microgreens can thrive on grow mats, hydroponic systems, or coco peat instead of traditional soil. The essential requirements are consistent moisture, adequate light, and good airflow to prevent mold and ensure healthy growth.
Final Thoughts
The process of knowing how to grow microgreens is a simple but effective method of making your daily nutritional intake and health, in general, better. They also occupy less space, are economical and produce quick and quality results, which makes them a perfect solution to any individual wishing to have fresh and high in nutrient greens in his home. With the help of this beginner-friendly guide, you may successfully grow microgreens and use them throughout the year to add a healthy touch to your meals and get as many nutrients as possible.
Greenu Microgreens is one of the brands that reveal to the community and inspire them to adopt sustainable, home based food supply. Their programs promote conscious consumption, sustainable farming systems, and make families discover the numerous advantages of fresh, locally cultivated microgreens.
Explore related articles:-https://greenu.in/how-to-grow-microgreens-easily-at-home-step-by-step/